
This page takes you through a fresh Linux Docker Compose installation, sign-in, and your first USB backup . Use the separate Synology guide for DSM and upgrade and rollback for an existing instance. Advanced setup and troubleshooting live in the installation guide.
1. Download the Compose file
Section titled “1. Download the Compose file”Prepare a Linux host with Docker Engine and the Compose plugin, an iPhone/iPad whose passcode you know, and a USB data cable, with space for a complete device backup. Image targets are linux/amd64 and linux/arm64; native device operation on Windows or macOS is not promised.
Save the compose.yaml that accompanies your selected image in a new deployment directory, such as $HOME/iosbackup-deploy.
Compose uses
--privileged,--network host,/dev/bus/usb:/dev/bus/usb, and/run/udev:/run/udev:ro, and persists/backups,/configs, and/var/lib/lockdown. Privileged mode grants host-level access. We recommend using only trusted images, restricting access sources, and keeping the Web UI off the public internet.
2. Start and sign in
Section titled “2. Start and sign in”Run in the deployment directory on the Linux host :
cd "$HOME/iosbackup-deploy"docker compose up -ddocker compose logs iosbackupThe first start creates the administrator password and encryption master key in persistent data/configs; restarts and upgrades reuse them. Only the newly generated administrator password appears in the first-start log; the master key is never logged. Do not share the first-start log publicly.
Open your protected access address in a browser. The default is http://<Linux-host>:9000/. Enter the administrator password from the log, click Verify and continue , open the first-use wizard, and select Skip for now, use USB only .
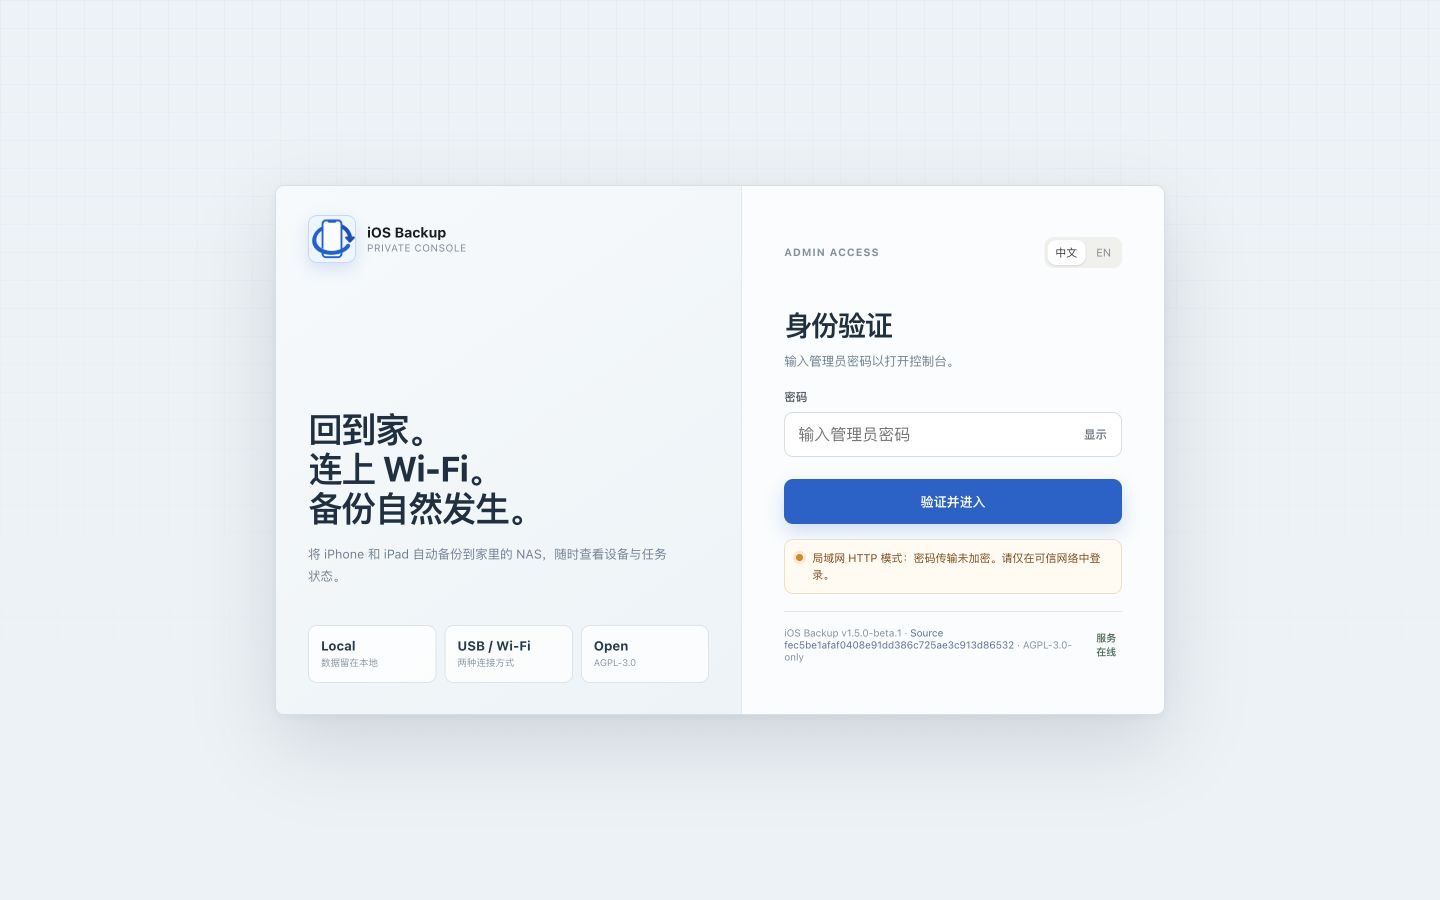
If the first-start log is unavailable, read the default password using sudo cat data/configs/admin_password in a protected terminal on the host . See the installation guide for custom passwords or startup failures. Cold startup may take tens of seconds; /healthz only proves HTTP responsiveness, not pairing or backup success.
3. Pair and complete the first USB backup
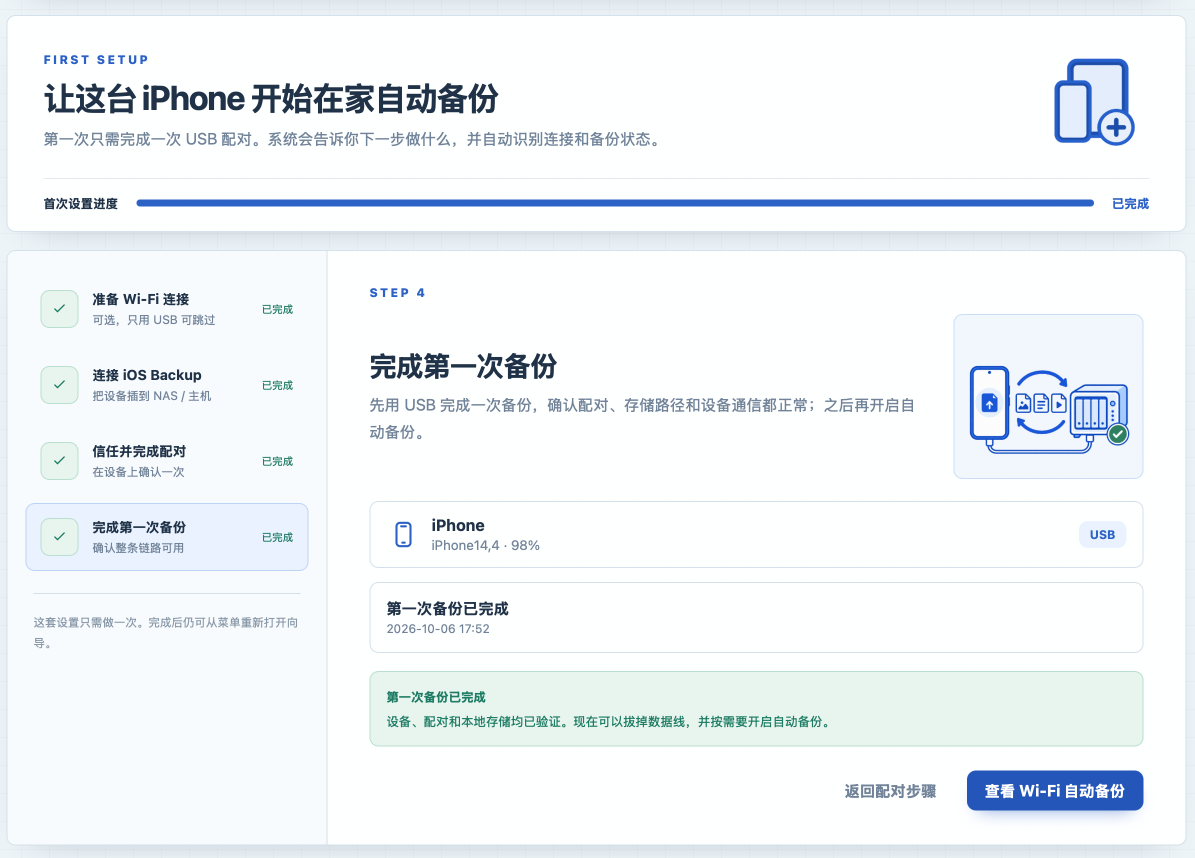
Section titled “3. Pair and complete the first USB backup”- Connect the phone by USB to the Linux host running the service. If Trust This Computer appears, unlock the phone and tap Trust , following any further prompts.
- Refresh devices in the Web UI and check pairing as prompted (pairing is usually complete after you tap Trust on the phone). Wait for the wizard to reach Complete your first backup and confirm the connection is USB .
- We recommend comparing the phone’s used capacity with free space in
data/backupson the host, allowing headroom. The wizard’s “Ready for the first backup” message confirms device and pairing readiness; it does not check available disk space. We recommend that you complete a USB backup first.
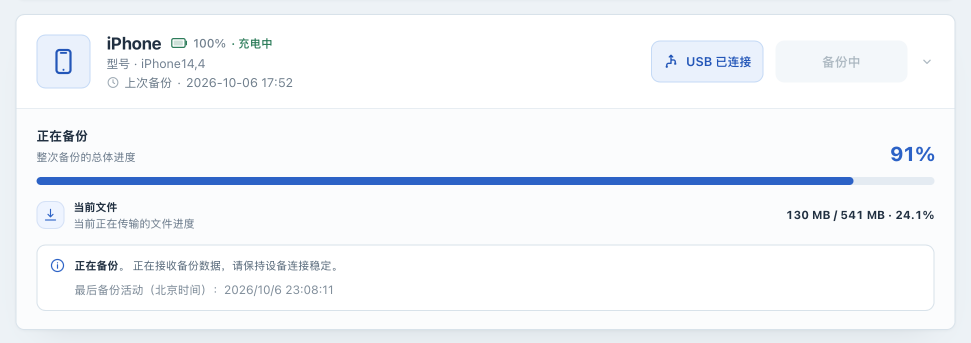
- Select Back up now and keep the cable connected. If the backup wakes the phone and displays a passcode screen, enter the device passcode as prompted.
- Wait for the backup to progress.
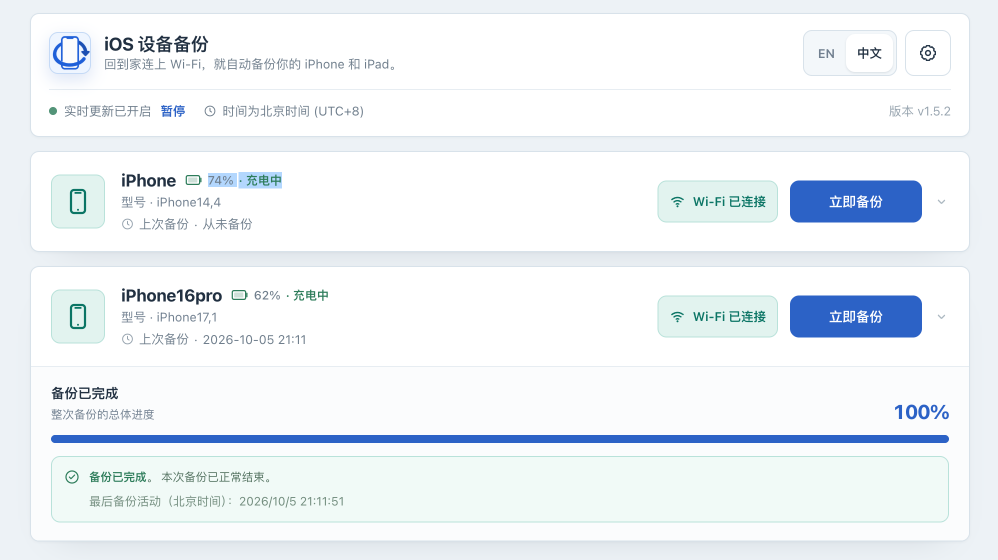
- Verify the completed status, completion time, and read-only backup information. On failure, retain data and follow the USB backup guide before retrying.
A device with existing backup encryption still produces encrypted backups. Retain its original backup password; successful backup does not establish that this instance has saved it. See encryption for encrypted-manifest access. Backup success also does not establish device-restore success.
Next steps
Section titled “Next steps”After your first successful USB backup, continue with Enable and validate Wi-Fi backup. Follow the guide to enable the device’s Wi-Fi connection option using your computer, then return to the Web UI, confirm that the device shows Wi-Fi connected , and complete a Wi-Fi backup.
Then continue as needed:
- Configure scheduled backups and notifications for routine backups and their results.
- View backup information and file lists, or learn about backup encryption and passwords.
- If something goes wrong, consult Troubleshooting and States, progress, and errors.
- Before upgrading or migrating, follow Instance backup and recovery to protect all three persistent volumes, including the password and
secret_keyindata/configs, plus any additional configuration and external keys you use. Then read Upgrade and rollback.
Find more tasks in the operations manual, and check Feature status for each capability’s support boundaries.