Goal and prerequisites
Section titled “Goal and prerequisites”Use Container Manager’s Project interface to deploy: prepare a shared folder → import Compose → start the project → retrieve the password and sign in → complete your first USB backup. The main procedure uses DSM and your browser. Use the optional SSH section at the end when you need further diagnostics.
Prepare a DSM administrator account, an iPhone/iPad whose passcode you know, a USB data cable, and a local storage volume with enough capacity.
- Use DSM 7.2 or later on a model whose Package Center provides a compatible Container Manager . Project supports Compose; DSM requirements vary by package version. See Synology’s release notes.
- Images support
linux/amd64andlinux/arm64; the NAS CPU architecture must match. Container Manager availability alone does not establish that every model can run this image or access USB devices. - For an existing instance, use Upgrade and rollback or Instance backup and recovery. Do not treat an existing data directory as a fresh deployment.
Interface entry points follow Synology’s official documentation. Button labels can vary by DSM version and language. Verify USB support on your model with the actual backup at the end of this procedure.
1. Install Container Manager and check storage
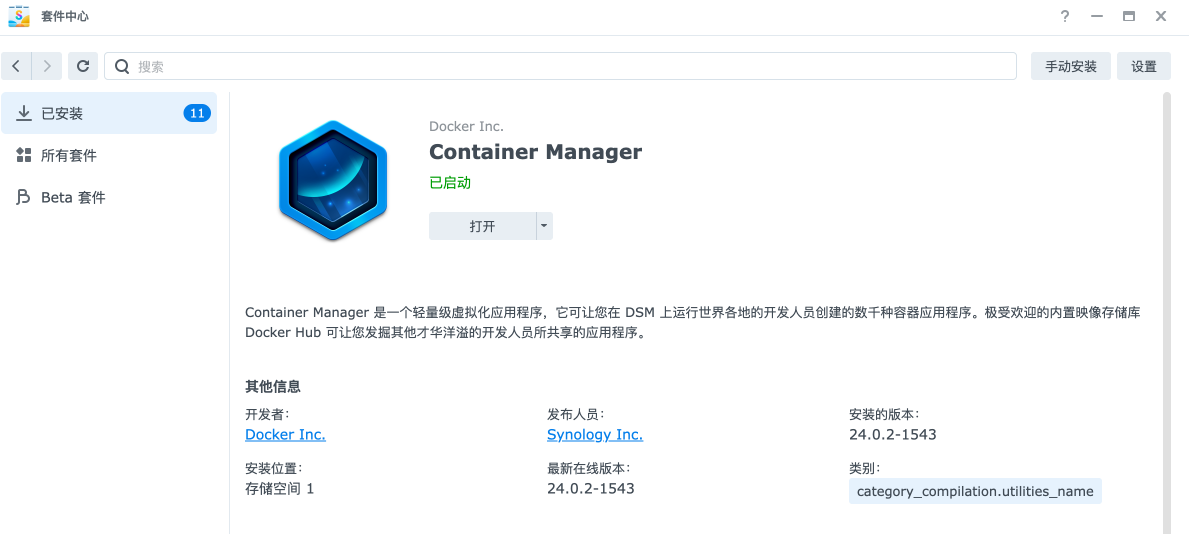
Section titled “1. Install Container Manager and check storage”- Sign in to DSM, find Container Manager in Package Center , and install it. Open it directly if already installed.
- Confirm that Project appears in the sidebar. If you have only the older Docker package or no Project entry, check model and package compatibility first.
- In Storage Manager , check free capacity on the target volume. Compare it with the phone’s used storage under Settings → General → iPhone Storage , leaving headroom for backups and NAS operation.
- In Container Manager’s project and container lists, check for an already-running iOS Backup instance. Wait for any active backup to finish first.
2. Prepare the deployment directory in File Station
Section titled “2. Prepare the deployment directory in File Station”- Open File Station and select the shared folder for backups, such as
docker. If you need a shared folder, create one under Control Panel → Shared Folder on the target volume. - Create an
iosbackupfolder inside it. The example full path is/volume1/docker/iosbackup; your volume might bevolume2, and your shared-folder name might differ. Use the actual directory throughout. - Check shared-folder permissions and directory properties to allow access only to the accounts managing this instance. The configuration directory needs a local filesystem supporting hard links; see Configuration reference.
- On your computer, download the matching compose.yaml and rename it to
docker-compose.yml, preserving all contents, for upload in the next step.
The default installation creates data directories and credentials automatically. Import the supplied Compose file; you need not generate passwords or a master key. After project creation, the data directories map as follows:
| Example NAS directory | Container directory | Contents |
|---|---|---|
/volume1/docker/iosbackup/data/backups |
/backups |
Device backups |
/volume1/docker/iosbackup/data/configs |
/configs |
Administrator password, master key, and application configuration |
/volume1/docker/iosbackup/data/lockdown |
/var/lib/lockdown |
Device pairing records |
Compose resolves ./data/... relative to the project working directory. Your project path determines where data is stored; do not move it casually after backups have started.
3. Import Compose in Project and start it
Section titled “3. Import Compose in Project and start it”-
Open Container Manager → Project → Create .
-
Set the Project Name , such as
iosbackup, and select the new deployment directory as Path , such as/volume1/docker/iosbackup. -
For Source , upload your computer’s
docker-compose.yml. Alternatively, create a file in the editor and paste the entire original Compose configuration. -
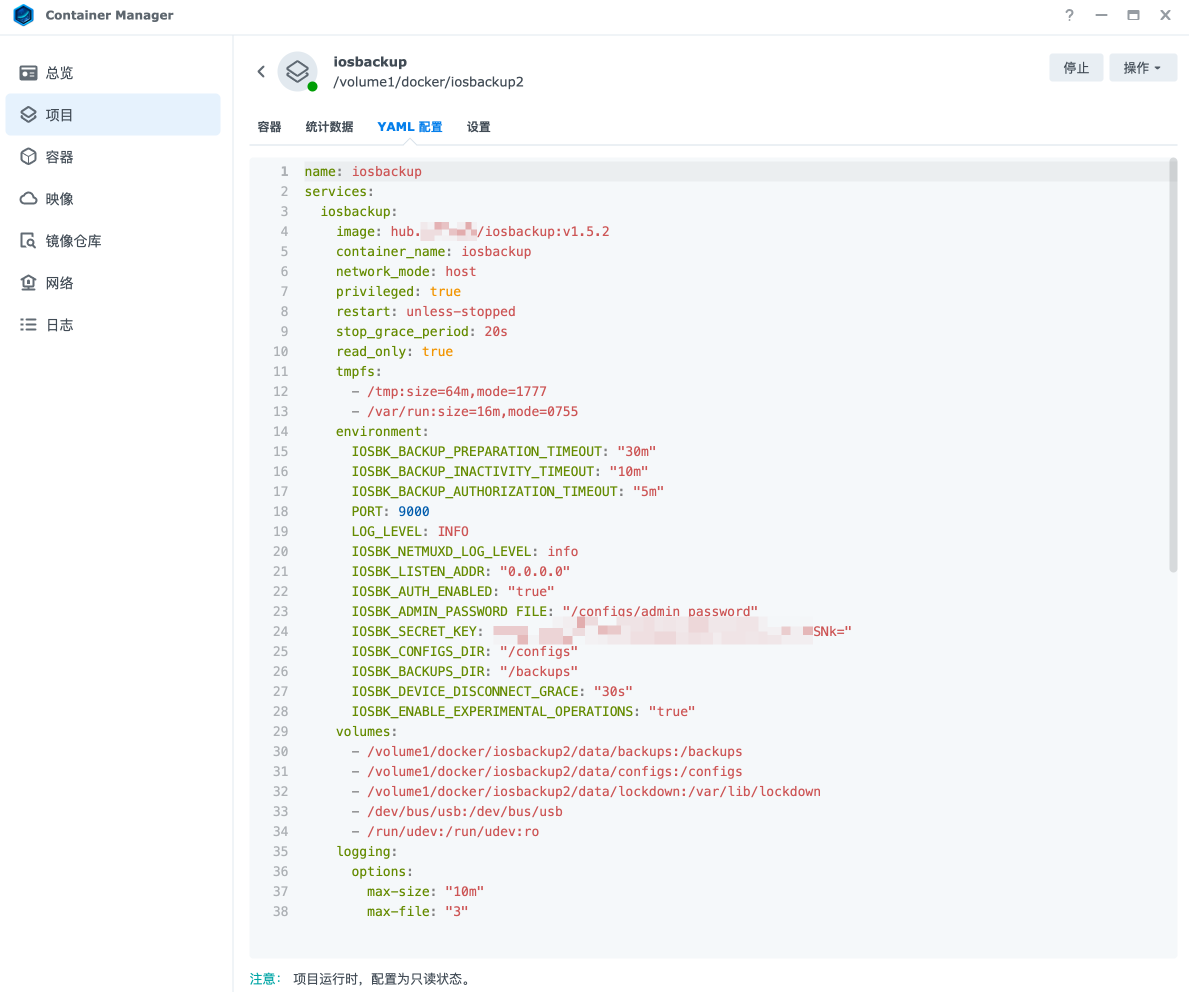
Check that the configuration retains these settings:
Setting Required value or purpose Image Default ghcr.io/razeencheng/iosbackup:latestnetwork_modehost, using the NAS networkprivilegedtrue, for device accessData mounts ./data/backups,./data/configs, and./data/lockdown, mapped to the three container directories aboveUSB mount /dev/bus/usb:/dev/bus/usbudev mount /run/udev:/run/udev:roListening port 9000by default -
Leave the Web Station portal option disabled. Access the application using the NAS address and application port.
-
Confirm the summary, select Done , and choose to start the project afterward. Wait for the image download and container creation; the first download can take some time.
-
Confirm that the project’s
iosbackupcontainer is running. If the project was created without starting, use Action → Build and then Start . This uses the image specified in Compose; you do not need to compile the source yourself.
See Synology’s Project help for the creation wizard and project actions. Start, stop, and update the application through this project rather than creating a duplicate with the single-container wizard.
Host networking needs no additional port mapping. The application port defaults to 9000, separate from DSM’s administration port. If DSM Firewall is enabled, use Control Panel → Security → Firewall to allow trusted management sources to reach that TCP port while retaining existing management rules. See Synology’s Firewall help. Do not expose the Web UI directly to the public internet.
4. Read container logs and sign in
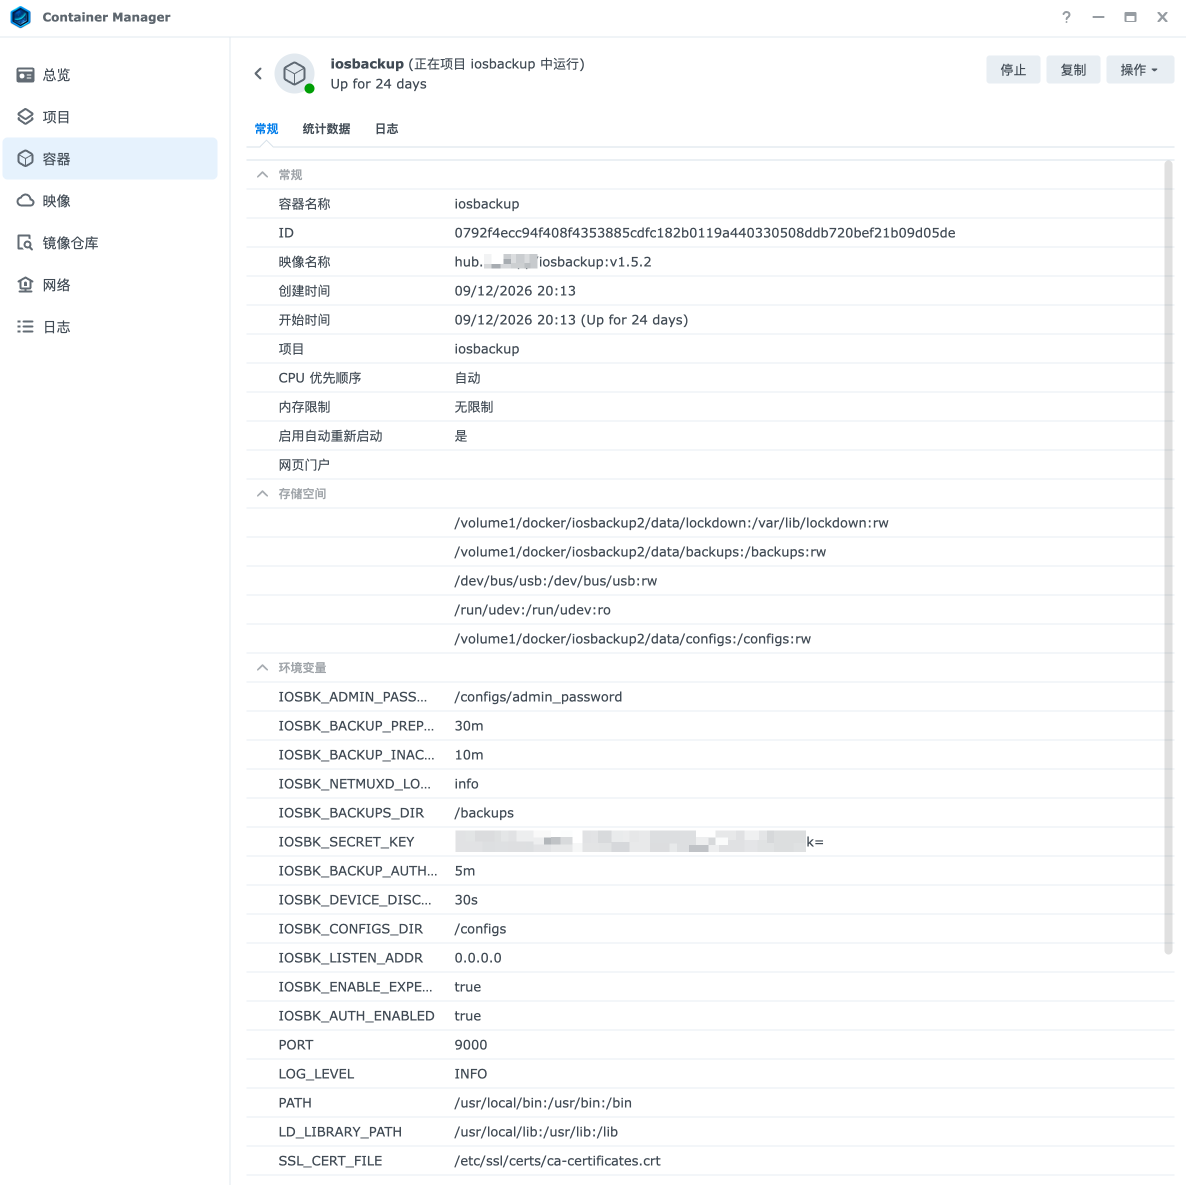
Section titled “4. Read container logs and sign in”- Under Container Manager → Container , select
iosbackupand open Details → Log . This shows the application’s output. Container Manager’s general activity log is not where the initial password appears. See Synology’s Container help. - Find the administrator password generated at first startup and store it securely. It appears only when generated; the master key is never logged. Hide the password in screenshots and shared logs.
- Open
http://<NAS-address>:9000/in your browser, enter the administrator password, and select Verify and continue . Use your existing HTTPS address if available. HTTP does not encrypt passwords, so direct access is limited to a trusted LAN. - After signing in, check the application version shown on the page. Select Skip for now, use USB only in the first-use wizard, then complete the USB backup below.
- Return to the project’s YAML Configurations to check the three data mounts and use File Station to confirm their location under the intended deployment directory. To inspect actual container mount sources, use the optional SSH checks below.
First startup stores the administrator password, authentication digest, and secret_key in data/configs. The configuration directory is 0700, and new secret files are 0600. If File Station cannot open them because of permissions, do not grant everyone read/write access. If you can no longer find the log containing the initial password, use the optional SSH instructions to read the default password. See Installation for custom passwords.
5. Complete the first USB backup on the NAS
Section titled “5. Complete the first USB backup on the NAS”- Connect the phone with a data cable to a physical USB port on the NAS . Enter the device passcode if prompted, or unlock it and tap Trust for a trust prompt. Keeping the phone unlocked or its screen on is not required.
- Complete pairing in the iOS Backup wizard and confirm that the target device shows USB connected . Connecting the phone to the computer displaying your browser does not connect it to the NAS.
- Check battery level, charging state, backup location, and free space, then select Back up now . Answer any passcode or trust prompt when backup wakes the phone, and keep the cable connected.
- Wait for an explicit Backup completed result and verify its completion time and latest backup record. See USB pairing and your first backup for detailed steps and progress explanations.
- After success, continue with Wi-Fi backup, then configure scheduling and notifications. Protect the three data directories using Instance backup and recovery.
Completion means the correct application version and data locations, working administrator login, and one actual successful USB backup. Record the NAS model, DSM/Container Manager versions, device OS version, and result for comparison after upgrades. Backup success does not establish a successful device restore.
Continue using Container Manager for routine management
Section titled “Continue using Container Manager for routine management”With no device job active, use Project → Action → Stop , Start , or Restart . Change configuration through the project’s YAML Configurations and follow its deployment prompts. Read Upgrade and rollback before upgrading.
Clean or Delete removes project resources and is not an ordinary Stop action. Do not use it to troubleshoot login or USB problems. Exported container settings do not replace backups of the three persistent data directories.
Optional: SSH diagnostics and default-password retrieval
Section titled “Optional: SSH diagnostics and default-password retrieval”Use this only when the GUI provides insufficient information, you need host USB paths, actual mounts, or disk status, or you need to recover the default password. This section does not create or start a second project.
-
In DSM, enable SSH under Control Panel → Terminal & SNMP → Terminal , restrict access to trusted management networks, and note the actual port.
-
Connect from your computer’s terminal, replacing the example account, address, and port:
Terminal window ssh -p 22 your-admin@your-nas -
Use an account in the administrators group, enter an administrator shell, and switch to the actual project directory:
Terminal window sudo -icd /volume1/docker/iosbackup -
Choose checks relevant to the problem; you need not run them all:
Terminal window uname -mls -ld /dev/bus/usb /run/udevdf -h .df -i .docker ps --filter name=iosbackupdocker logs --tail=200 iosbackupdocker inspect iosbackup --format '{{range .Mounts}}{{println .Source "->" .Destination}}{{end}}'x86_64corresponds toamd64;aarch64corresponds toarm64. Skipdf -iif unsupported. If a path is missing, check model and deployment prerequisites rather than creating an empty/run/udevto stand in for device information. Redact results before sharing. -
If the initial password log is unavailable, read the default password in this protected NAS administrator shell :
Terminal window cat data/configs/admin_passwordThis is a host file, not a command to run in Container Manager’s Open terminal. The runtime image provides no ordinary shell or cat. Do not publish its output or read and display
secret_key. -
To distinguish a NAS-local service problem from an access-network problem, if curl is already available on the NAS, check:
Terminal window curl -fsS http://127.0.0.1:9000/healthzcurl --fail --user iosbackup http://127.0.0.1:9000/api/versionReplace
9000if you changed the port. curl prompts interactively for the administrator password. A successful/healthzonly establishes an HTTP response, not USB pairing or backup success.
Exit the administrator shell and SSH session afterward. If SSH was enabled only for this troubleshooting, you can disable it in DSM after confirming no transfers depend on that connection.
If something goes wrong
Section titled “If something goes wrong”| Symptom | Check in the GUI first | When optional SSH helps |
|---|---|---|
| Project creation or image download fails | Check deployment output, image source, network, and NAS architecture | When you need to confirm architecture or Docker status |
| Container exits immediately | Read its logs for path, permission, or port conflicts | When logs point to missing mount sources or permissions |
| Container runs but the browser cannot connect | Check the NAS address, default port, and DSM Firewall; host networking has no port mapping | Use NAS-local /healthz to distinguish service and access-network problems |
| No USB device or pairing fails | Confirm a data cable connects to the NAS and answer phone passcode/trust prompts; inspect application and container logs | When you need to check /dev/bus/usb, /run/udev, and actual mount sources |
| Backup directory is not writable | Check the File Station directory, capacity, and DSM permissions | When you need actual paths, disk status, or inode information |
| Administrator password is forgotten and initial logs are gone | Check whether this instance uses a custom password | Read the default data/configs/admin_password |
Retain existing configuration, pairing records, and backups. If the problem persists, follow Troubleshooting to prepare sanitized environment details and error logs.